
A crowded desk can make even a simple working day feel uncomfortable. Large monitors take up valuable space, cables collect behind the screen, and a laptop or notebook often has nowhere convenient to go. A well-chosen PC monitor stand can solve several of these problems at once. It can lift the display to a more comfortable viewing height, free up desk space and make it easier to organise a home office, gaming setup or professional workstation.
However, choosing the right monitor stand involves more than finding an attractive design. You need to consider your monitor’s weight, screen size, mounting pattern, desk construction and the amount of adjustment you need. Some stands are designed for a single display, while others support two or three monitors. Articulated arms offer greater flexibility, and models with built-in USB hubs can make everyday connectivity more convenient.
This guide explores the main benefits of PC monitor stands, explains the important buying criteria and reviews two options: the ARCTIC Z3 Pro triple-monitor arm and a budget-friendly gas-spring monitor arm.
Table of Contents
Why a PC Monitor Stand Is Worth Considering
A traditional monitor stand usually occupies part of the desk directly beneath the screen. Depending on its design, it may leave only a small area for a keyboard, notebook or other accessories. A desk-mounted monitor arm moves much of this support structure away from the central work surface.
That extra room is particularly useful when you work with a laptop and an external display. You can position the monitor above the desk and keep your laptop, keyboard or documents underneath it when they are not in use. A monitor arm can also make it easier to move the screen aside when you need more space for writing or another task.
There is another important advantage: adjustability. A fixed stand may not place the screen at the ideal height for every user. An adjustable arm allows you to change the monitor’s position to suit your seating arrangement and working habits. This can make a workstation feel more comfortable, especially during long sessions.
Nevertheless, a monitor stand is not a complete solution to poor posture. Chair height, desk height, keyboard position, lighting and regular movement all contribute to a comfortable working environment.
What to Check Before Buying a Monitor Stand
Before comparing products, check the specifications of your monitor and desk. These details can determine whether a stand will fit securely and provide the adjustment you expect.
Monitor Size and Weight
Manufacturers usually advertise monitor compatibility by diagonal screen size, such as 24, 27 or 32 inches. This is a useful starting point, but it is not enough by itself. A wide monitor may extend beyond the recommended dimensions of an arm even if its diagonal measurement appears suitable.
Weight is equally important. Check the monitor’s weight without its original stand, then compare it with the arm’s supported weight range. A mount that cannot support the display properly may sag, move unexpectedly or fail to hold the selected position.
For multiple displays, check the weight limit for each arm and the combined width of the monitors. Two screens that fit individually may still be too wide to position comfortably side by side.
VESA Mounting Compatibility
VESA refers to a standardised mounting-hole pattern used by many monitors and mounting accessories. Common patterns include 75 × 75 mm and 100 × 100 mm. You should confirm which pattern your monitor supports before purchasing an arm.
Some monitors do not have standard mounting holes, particularly certain compact or portable models. A compatible adapter may help in some cases, but you must verify that the adapter is designed for your specific display. Never assume that every monitor can attach directly to every arm.
Also check the included screws and spacers. The mounting plate must fit securely without damaging the monitor casing or interfering with its ports.
Desk Thickness and Construction
Most desk-mounted arms use a clamp or a grommet installation. A clamp attaches to the desk edge, while a grommet mount passes through a suitable hole in the worktop. Both can work well when installed according to the manufacturer’s instructions.
The desk itself matters just as much as the mounting hardware. Thin, damaged, hollow or honeycomb-style worktops may need extra support. A heavy monitor arm can concentrate force on a small area, so check the permitted desk thickness and whether a reinforcement plate is recommended.
Do not attach an arm to plasterboard or another unsuitable surface using ordinary desk-clamp hardware. Follow the product instructions for the actual mounting method.
ARCTIC Z3 Pro: A Practical Choice for Multiple Monitors
The ARCTIC Z3 Pro range is designed for users who want to arrange multiple displays without filling the desk with separate monitor bases. The Z3 Pro Gen 3 is a triple-monitor desk mount with a four-port USB hub, making it worth considering for productivity work, gaming and multi-screen setups.
Its principal attraction is the ability to position compatible displays together. This arrangement can be useful for people who compare documents, manage several applications or keep communication tools open alongside their main work. A central monitor can be used for the primary task, while the side displays provide additional workspace.
The Gen 3 model supports VESA 75 × 75 mm and 100 × 100 mm mounting patterns. Its published specifications list a maximum monitor weight of 15 kg per arm, with screen-size guidance of up to 32 inches for standard displays and up to 29 inches for ultrawide monitors. Actual compatibility also depends on monitor width and the manufacturer’s conditions.
These limits are important because product generations can have different specifications. Check the exact version being sold rather than relying on a description that refers only to the Z3 Pro name.
Height Adjustment and Viewing Flexibility
A multi-monitor arm helps you align displays at a more suitable height and angle. This is especially useful when the original stands have different shapes or heights. A more consistent arrangement can make it easier to move your eyes between screens without repeatedly adjusting your seating position.
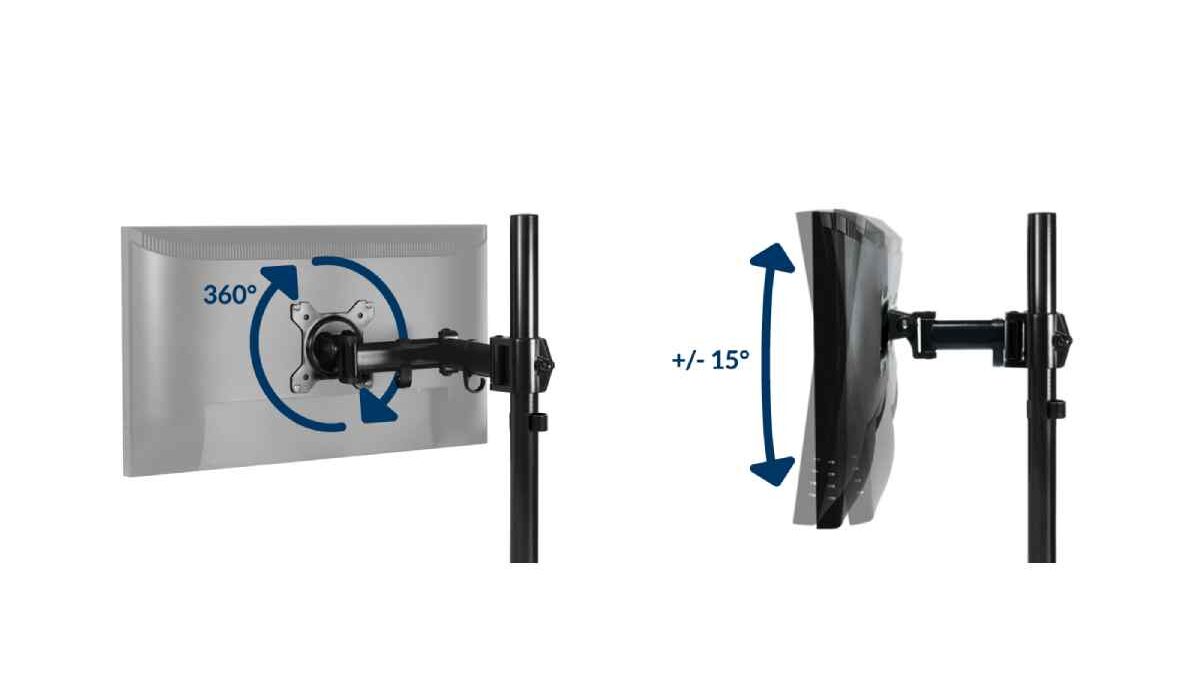
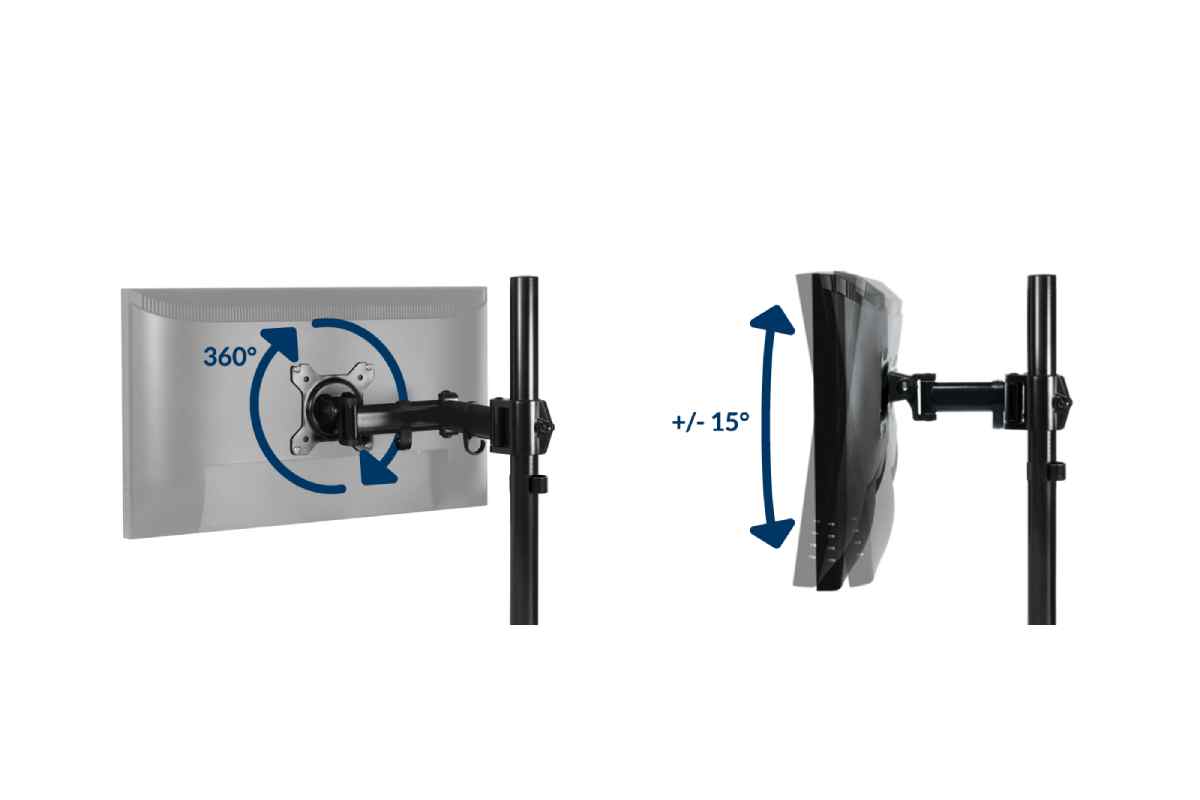
The Z3 Pro Gen 3 specifications list 360-degree rotation, 180-degree swivel and tilt adjustment of approximately 15 degrees in either direction. These movements allow users to arrange supported screens for their working needs, although the practical range depends on the monitor dimensions and how the displays are positioned.
USB Hub and Cable Organisation
The built-in four-port USB hub can help bring compatible peripherals closer to the desk surface. Depending on your setup, this may be convenient for connecting accessories such as a keyboard, mouse or other USB devices. The hub has a separate micro-USB power input, and power availability depends on the configuration.
The hub does not replace every computer connection. Check which ports your peripherals require and whether additional power is needed. You should also plan the monitor’s video and power cables separately, keeping enough slack for adjustment without allowing cables to pull against the connectors.
Budget-Friendly Articulated Monitor Stand
A single gas-spring monitor arm can be a sensible alternative if you use one display and want to keep costs under control. A typical model in this category supports monitors between 17 and 32 inches, with a maximum load of around 8 kg. These figures describe the type of product in the supplied specifications, so confirm the limits of the exact model before buying.
The main benefit of a gas-spring arm is flexible positioning. Depending on its design, it may allow the screen to move up or down, tilt forward or backward, swivel from side to side and rotate between landscape and portrait orientation. This can be helpful when you switch between writing, video calls, research, gaming and other tasks.
A height-adjustable arm may also make it easier to share a screen with another person or move it temporarily out of the way. However, the advertised range of movement is not always available in every installation. A large display, a shallow desk or a wall close behind the monitor can restrict how far the arm moves.
Installation and Everyday Usability
Some articulated stands support both a desk-edge clamp and a grommet mounting option. This provides flexibility when a desk has a suitable hole or when its edge is accessible. Before installation, check the required desk thickness, available clearance and the instructions for tightening the mount.
The arm should move smoothly but remain stable when released. If the screen slowly drops, rises or tilts after adjustment, its weight may be outside the arm’s supported range or the tension may need to be set correctly. Do not force the mechanism beyond its specified limits.
Cable-management clips can also improve the finished setup. Route the power and display cables through the supplied guides, leaving enough slack for full movement. This reduces visible clutter and helps prevent cables from catching on the arm.
Who Should Choose a Budget Arm?
A single-monitor gas-spring arm is a good option for a student, home-office user or gamer who wants more desk space without paying for a multi-monitor system. It may also be suitable for people who frequently change the screen angle during the day.
A fixed riser or basic monitor stand may be a better purchase if you rarely adjust the screen and simply need to raise it. A more advanced arm is worthwhile when you regularly reposition the monitor or need to reclaim desk space.
Ergonomics: Position the Screen for Comfortable Work
A monitor stand can support a more comfortable workstation, but its value depends on how you set it up. Start by placing the display directly in front of you so that you do not need to turn your neck repeatedly. Adjust the height so your head remains in a natural position rather than leaning forward or looking upward.
The correct position varies with screen size, viewing distance, eyesight and personal comfort. As a practical starting point, place the top of the display around eye level or slightly below it, then adjust it to suit your posture. If you use bifocal or progressive lenses, a somewhat lower position may be more comfortable.
Keep the screen far enough away that you can read without leaning forward. Increase text size or operating-system scaling when necessary instead of moving your head closer to the monitor. Reduce glare by adjusting the screen angle and arranging lights so they do not reflect directly into the display.
A monitor arm also makes it easier to create a more balanced workspace around your laptop. If you write for long periods, choosing a suitable laptop and keyboard arrangement can help you keep the screen at a comfortable height while your hands remain in a natural typing position. The guide to laptops for writers can help you explore laptop features that matter for extended writing sessions.
Remember that even a well-adjusted monitor cannot eliminate the effects of sitting still for too long. Take regular breaks, change position and move throughout the day.
Organising Your Desk and Improving Connectivity
A monitor arm is only one part of an efficient workstation. Once the display is raised, consider where the keyboard, mouse, laptop, charging accessories and documents will go. Keep frequently used items within easy reach, and avoid placing objects where they prevent the arm from moving safely.
If you connect a laptop to an external display, check whether your computer supports the video output you need. USB-C can carry video on supported devices, but not every USB-C port supports display output. Compatibility depends on the laptop, monitor and cable. Before purchasing accessories, review the guide to USB-C monitors to understand the connections and features to check.
Cable organisation should also allow for future changes. Labeling cables or keeping them in separate groups can make it easier to identify a display cable, power lead or peripheral connection when troubleshooting. Avoid pulling cables tightly around moving joints, and disconnect equipment safely before changing the installation.
Improving Everyday Computer Productivity
A monitor stand helps organise your physical workspace, while efficient computer habits can make daily tasks easier to manage. If you regularly switch between applications, browser tabs and documents, learning useful keyboard commands can reduce repetitive mouse movements and help you work more efficiently. Combine these shortcuts with a well-positioned monitor and an organised desk to create a workstation that supports a smoother workflow.
Common Monitor Stand Buying Mistakes
Several avoidable mistakes can turn a promising purchase into an inconvenient one.
Choosing by screen size alone: Two monitors with the same diagonal measurement may have different widths and weights. Check all three specifications before ordering.
Ignoring the VESA pattern: Confirm the mounting-hole spacing and whether an adapter is required. A monitor that lacks compatible mounting points may not fit the arm directly.
Overlooking desk strength: A clamp can damage a weak or hollow worktop. Check the desk material and use suitable reinforcement when recommended.
Expecting unlimited movement: The arm’s advertised rotation or extension may be restricted by the desk, wall, screen size or nearby equipment. Measure the available space before buying.
Assuming every USB hub powers every device: A hub’s data ports and power capacity have limits. Verify the requirements of external drives and other power-hungry accessories.
Forgetting installation and warranty details: Check what hardware is included, whether the mounting method suits your desk and what warranty the manufacturer provides for the exact model.
Which PC Monitor Stand Should You Choose?
The best option depends on how you work and how many displays you use. The ARCTIC Z3 Pro Gen 3 is worth considering for a multi-monitor workstation that needs flexible screen placement and a built-in USB hub. Its size and weight limits should be checked carefully against each display.
A budget-friendly gas-spring arm is more appropriate for a single compatible monitor when adjustability and desk space are the main priorities. If you only need to raise the screen and rarely change its position, a simple monitor riser may offer better value with less installation effort.
Before making a final decision, measure your desk, confirm the monitor’s weight and VESA pattern, and check the arm’s supported screen dimensions. Consider cable routing, adjustment range and warranty as well as the price. A suitable PC monitor stand should fit your equipment securely, provide useful movement and make your workspace easier to use every day.