Nvidia G-Sync – Guide: Activate and optimize settings
How to Enable G-Sync –
Our instructions show how you can activate Nvidia’s variable image synchronization G-Sync in the driver and configure it for games with as little input lag as possible.
Never again tearing in games? Monitors with a variable refresh rate, which synchronize their image structure with the fps currently supplied by the graphics card, prevent annoying image tearing.
The technology (s) that synchronize the graphics card and display is G-Sync for Nvidia and Geforce cards (AMD has something similar to offer with FreeSync). Our guide shows what you need to play with G-Sync, how to configure the Geforce driver and your games, and finally gives tips on optimizing G-Sync even further with the help of a frame limiter.
You can find more technical background and practical experience with the image synchronization technologies from AMD and Nvidia in our comparison:
Also Read: Laptops For Programming
G-Sync requirements
How to Enable G-Sync –
To get the benefits of G-Sync, you need the appropriate hardware. A suitable Geforce graphics card requires for this. That includes all GTX models of the Pascal and Turing generation, starting with the GTX 1050 up to the RTX 2080 Ti. But the previous generations from the GTX 650 Ti Boost (Maxwell and Kepler) can also use G-Sync. G-Sync is also compatible with all Titan graphics cards. A current list of all supported GPUs creates here.
In addition to the graphics card, a monitor with a G-Sync module also requires. There are currently around 60 models on the market, starting at about 330 euros and ending at well over 2,000 euros.
The monitors range from 23 to 35 to 65 inches with 60 up to 144 or 240 Hertz and offer resolutions from Full HD (1920×1080 pixels) to UWQHD (3440×1440 pixels) to UHD (3840×2160 pixels). Compared to FreeSync monitors from AMD, G-Sync models are more expensive in direct comparison because the manufacturers install and have to pay for the proprietary G-Sync chip from Nvidia.
The difference to otherwise practically identical TFTs without G-Sync (usually with the free Freesync) is usually around 100 euros. Then the graphics card and monitor are connected with a Displayport cable from version 1.2. And also, the latest Geforce driver for Windows 7, 8, 8.1, or 10 installers.
Configure drivers
How to Enable G-Sync –
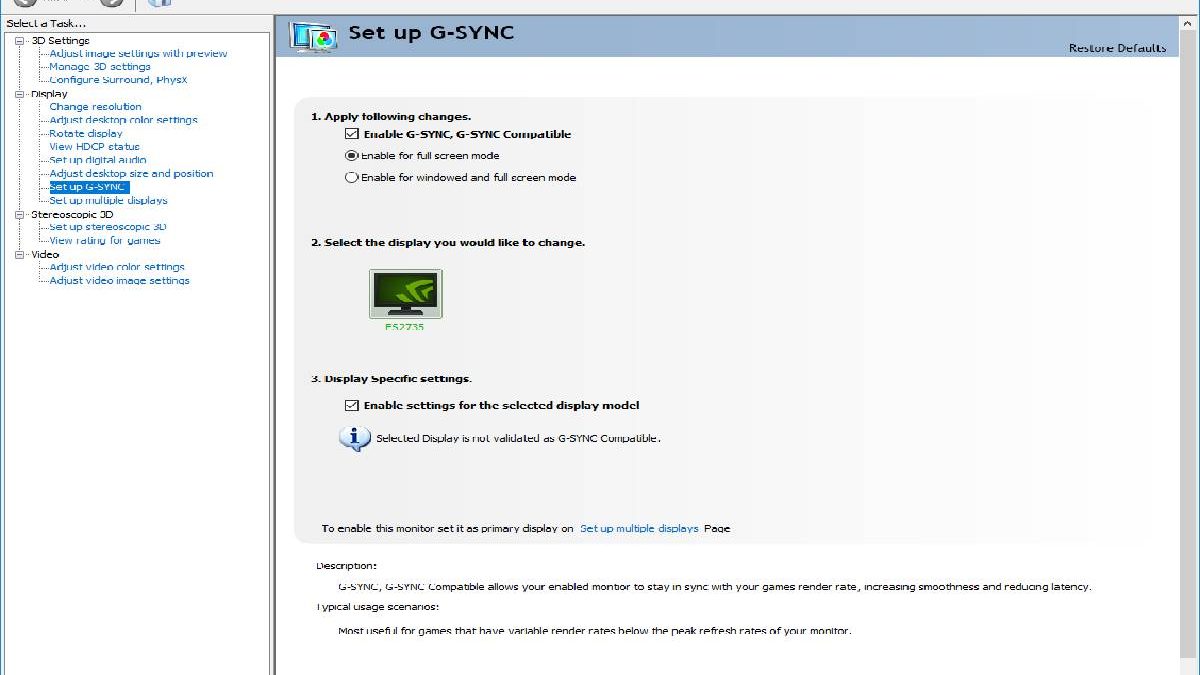
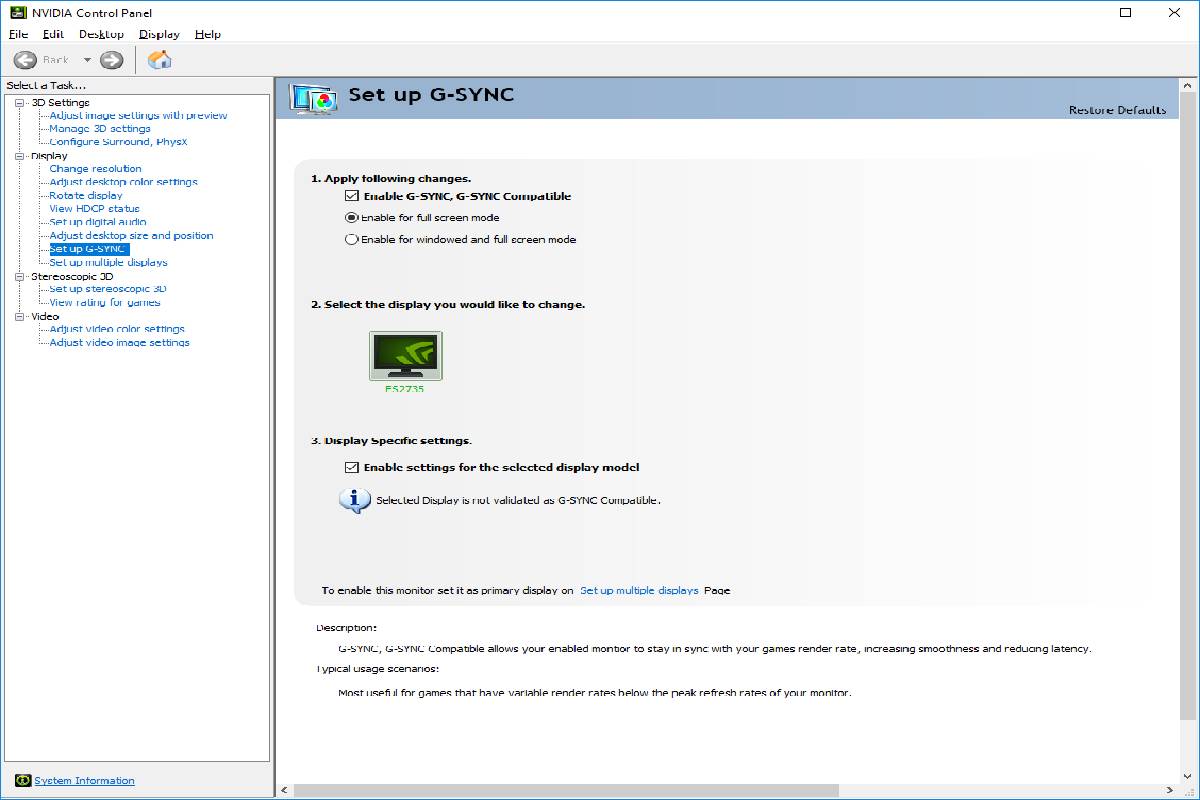
- Opens the Nvidia control panel (icon in the system tray or right-click on the desktop).
- Navigate under »Display« to the option »Set up G-Sync. «
- Activates G-Sync for the »window and full-screen mode. «
The selection for window and full-screen mode is practical for multitasking because you can play games in maximized window mode. And also, switch from the game to another program (via Alt + Tab) without interruption. For example, to join a Discord server or with friends chat or surf the internet during the matchmaking process.
With the setting made, G-Sync now runs within the specifications of your monitor. In our case, the variable refresh rate works between 33 and 144 Hz.
However, if our PC calculates more fps than the maximum value of G-Sync, the tearing can occur again. To prevent this, a different setting requires in the driver:
When G-Sync is activated, the option does not fix. The frame rate of the monitor to the selected value (in our case, 144 Hz). But serves as a kind of frame limiter, so that from now on, you do not exceed the maximum (G-Sync). Hertz in Play can exceed and Vsync only then takes effect.
That ensures that you always move within the G-Sync frequency range and never see tearing. However, if you reach the threshold in which Vsync takes effect, the input lag increases slightly. In the next section of our guide, you will learn how you can reduce this significantly.
Also Read: Panasonic Toughbook FZ-55 – Casing, Connections, Display, and More

Unlock Success: Tips to Increase YouTube Subscribers
If your goal is to increase YouTube subscribers for your business channel, then you require a calculated approach to audience…

Engagement Rates with New Instagram Followers
Instagram Followers Having a lot of Instagram followers is cool. But does it do you any good? This article will…